

Welcome to a week of fantastic collaboration between IMAGINE Crafts and Stampendous! We have to admit that our two companies were made for each other and we’re proud to have shared a long relationship of working together. After all, what are stamps with out ink? The projects created by our artists this week feature IMAGINE Crafts Radiant Neon™ inks paired perfectly with coordinating colors of Fran•táge Color Fragments from Stampendous, along with some of their newest stamp designs and Stack Art kits.

You can win 3 of the brand new Radiant Neon™ ink pads and 3 jars of our Color Fragments! We’ll give away three prize packages (color is our choice) to U.S. Mailing addresses. You have until the end of Sunday, May 25 to comment on as many of the Design Team Blog Posts from this week as possible. Monday we’ll draw three random blog posts and one comment from each of those posts will win a prize package!
Here are the designers with some inspiration for you today. Be sure to leave them some appreciation when posting your comments on their posts.
So are you ready for some exciting inspiration?
Here’s who is hopping today:
Sharon Morrison
Janelle Stollfus
Naghma Husain
Wendy Price
Baerbel Born
Lea Kimmel
Emily Lanham
***Blog Hop Hint – if you click on a link that takes you to a page saying something like, „Sorry this page cannot be found,“ just click on the header at the top of the blog (usually a picture, or the blog’s name), and it will take you to that blog’s most recent post. That post *should* be our hop. If not, you can probably scroll down a short way to find the hop post. You can check out the Official Rules for all our contests if you have questions.
If you missed any of the previous days of the Hop, select one of these links to take a look at the artists and the projects that they created: MONDAY May 19th, TUESDAY May 20th, and Wednesday May 21st.
:::::::::::::::::::::::::::::::::::::::
(Diesen Blogbeitrag in Deutsch findet ihr HIER.)
When I made my latest video about a fun and quick way to color multiple images I wanted to go a step further, and use the same technique to partly color the image with different color blocks.
Material needed:
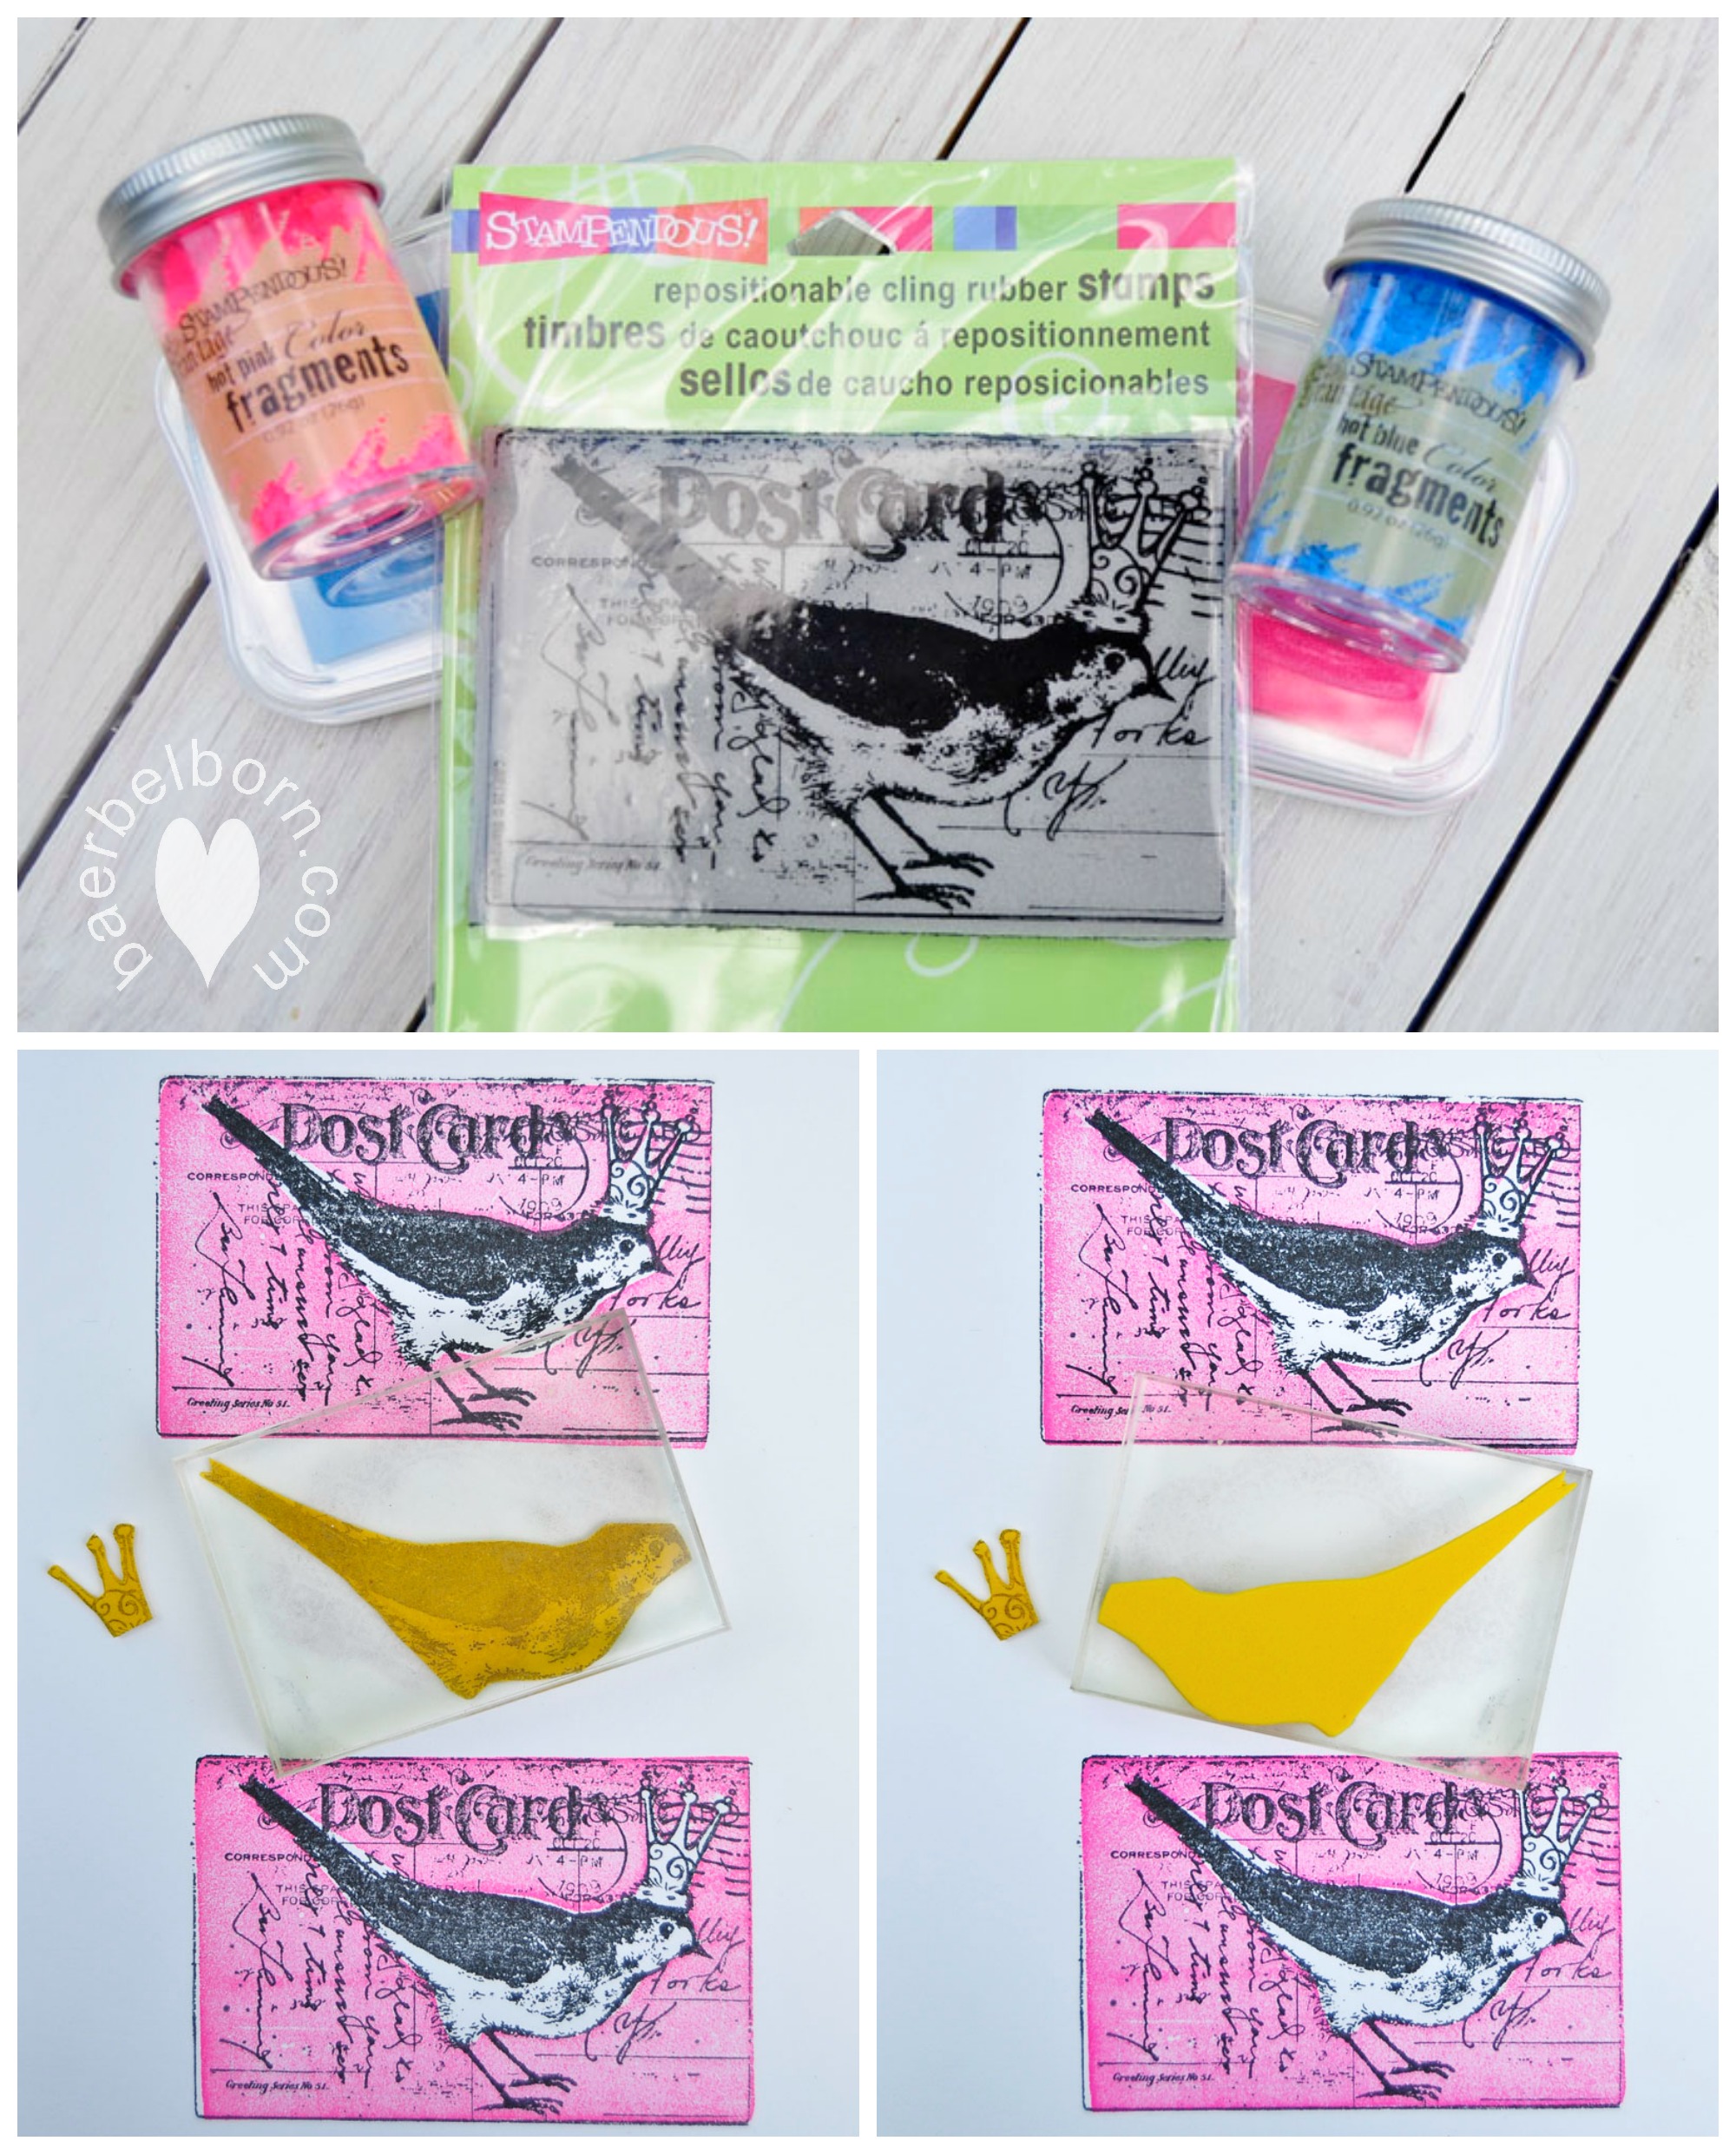
Stampendous Stamp „Bird post“
craft foam, scissors, StazOn and Memento in black
Radiant Neon ink stamp pads, Stampendous Fragments
acrylic block, Tack’n’Peel
You need to stamp your image with StazOn onto the craft foam. Print two or three, to make it easier to cut the needed parts. Cut out your desired parts of the image you want to color differently.
Print your image with Memento. Prepare your block with Tack’n’Peel, then put the cut out foam to the block with the STAMPED side. That makes sure the image will print properly.
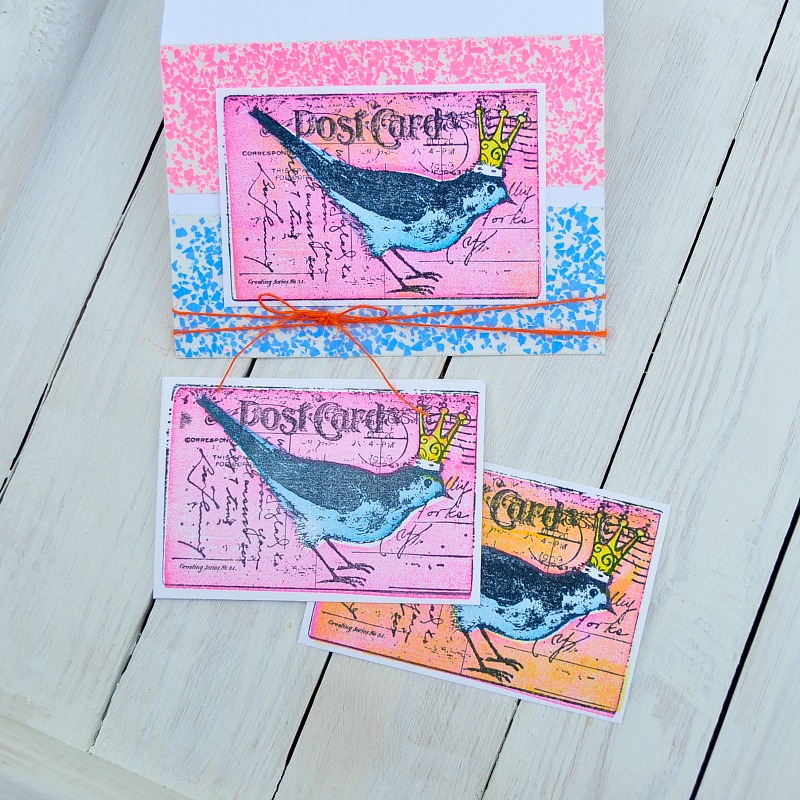
Now ink your foam with the desired Radiant Neon ink and print. Because the block and the Tack’n’Peel is transparent you can see where you will print. Slight gaps between image and color block give an artsy look and look like you did it on purpose.
The left picture shows the foam as you may see it during printing, the one on the right shows the foam as you can see it while inking it. The pink color was printed with the ’negative‘ foam that I have cut and inked in the first step.
I made another picture to show the foam stamps I made for this card. I made 3 foam stamps: The background (excluding the bird), the bird and the crown. I left the felt part of the crown white on all cards.

Extra tip: Experiment with inking some of the parts a second time with another color. Please check the prints in the last picture, the right one was made with one color, the left with two colors: I first printed with Radian Neon Electric Pink, cleaned the foam stamp and inked it again with Electric Coral in a random fashion (do NOT ink the whole foam stamp when printing a second time!). I love the effect! Try this on your own and have fun with color!
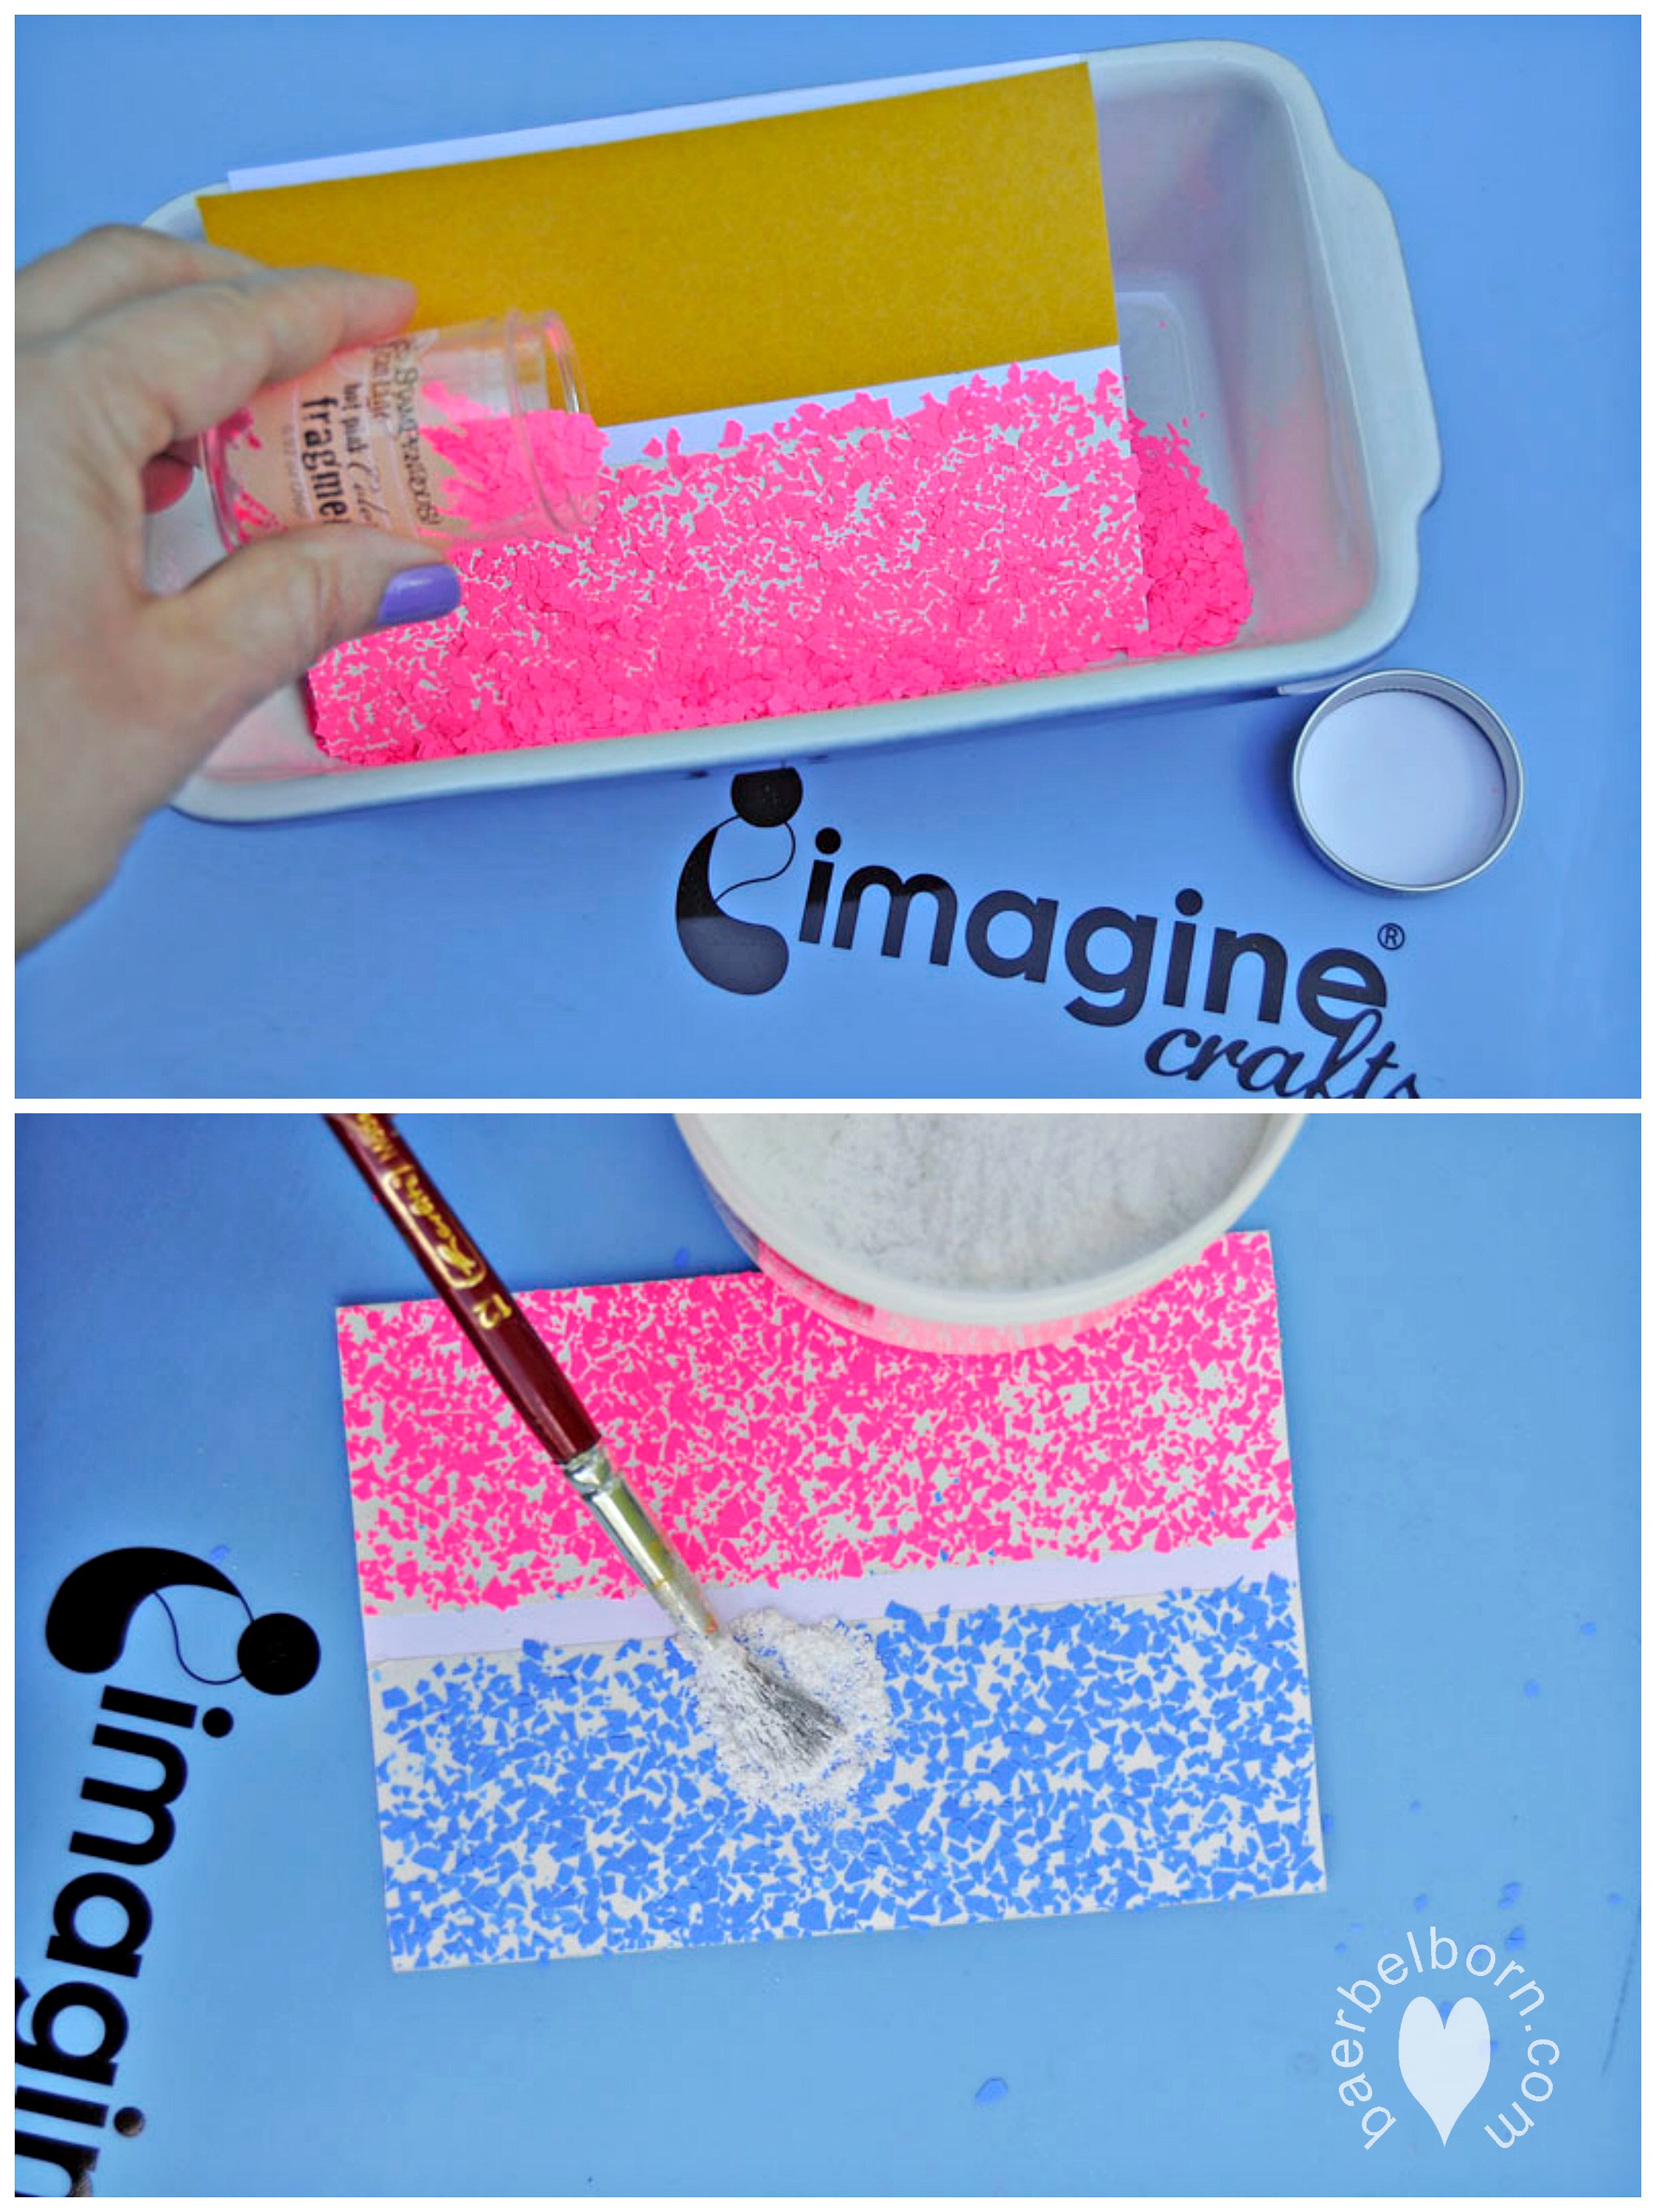
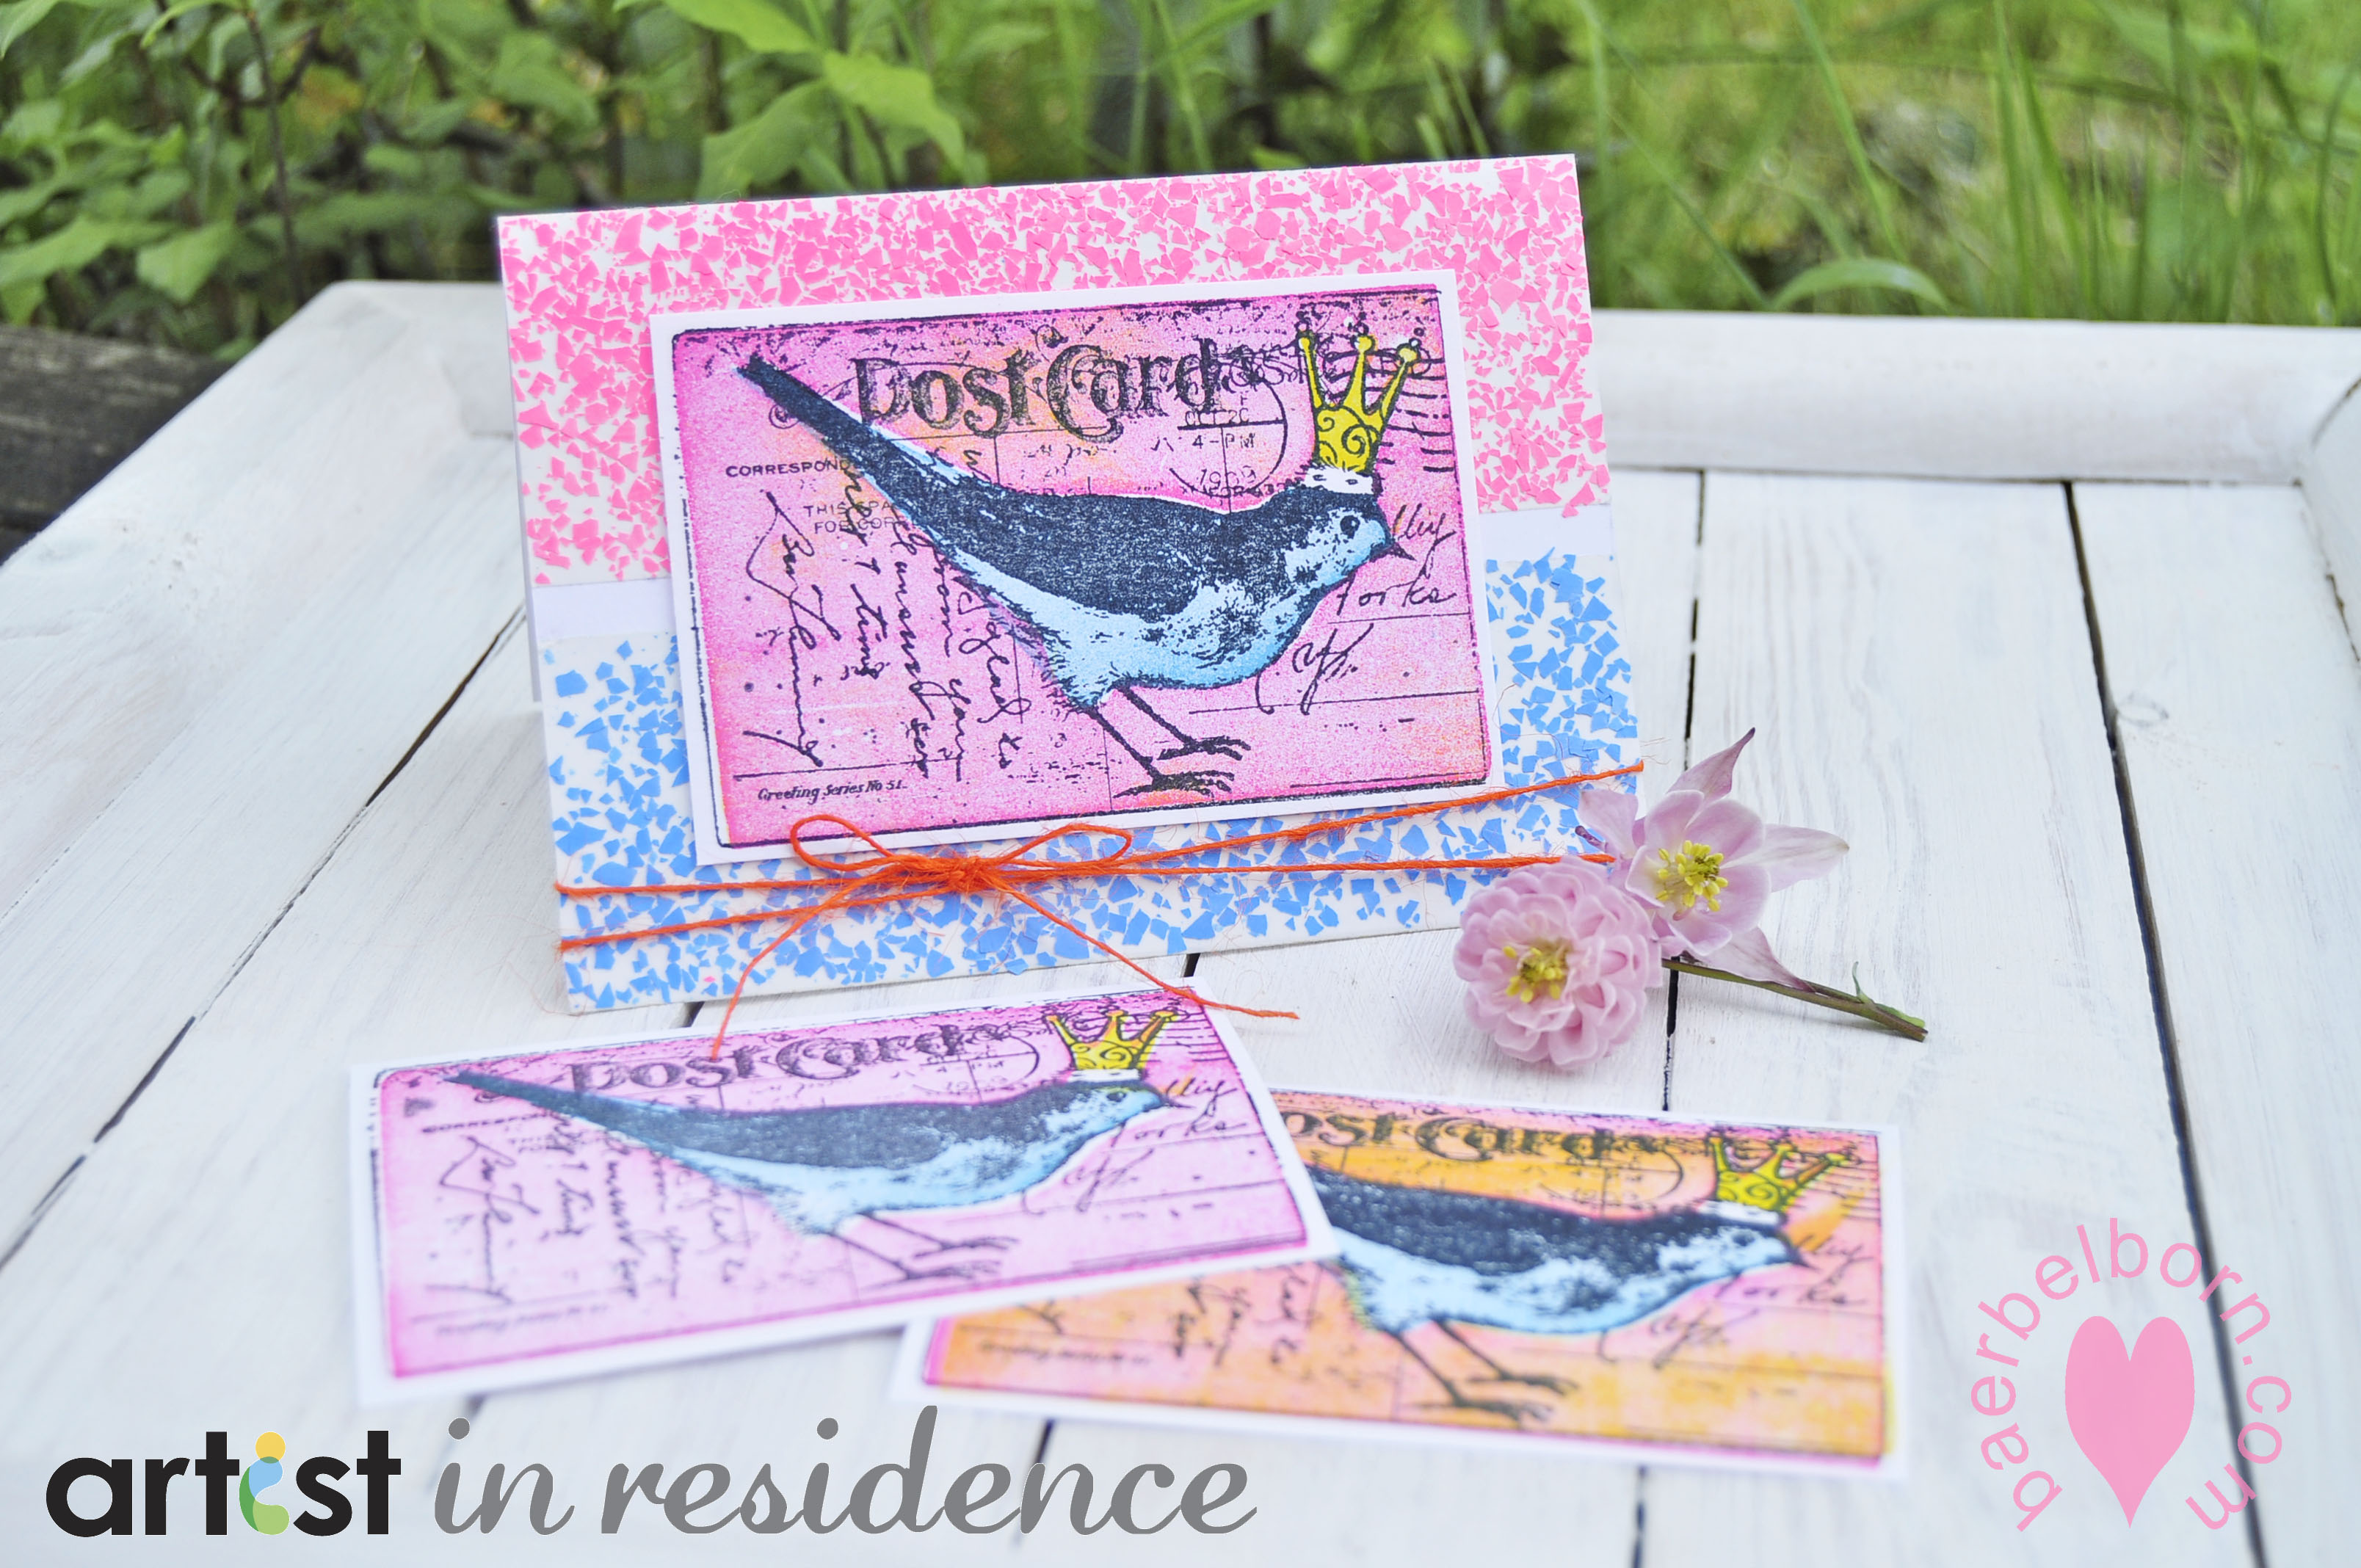
To finish the card I made a speckled background with Fragments by Stampendous. I used sticky tape on a card and poured the fragments over the card. Use any tray you can find in your household to collect the Fragments while pouring.
When I added the Fragments to the tape I rubbed slightly over the tape with my finger tips to secure the Fragments. A few may come of, this is ok. To fill the gaps between the Fragments I used some baby powder with a brush on the tape, this will make all sticky bits nice and smooth. Carefully wipe off any excess and your are done.
I hope you like it! Yours, Baerbel
Kommentare
Kommentar veröffentlichen
Vielen Dank für Deine Nachricht, ich hoffe Google zeigt sie mir auch an... liebe Grüße, Bärbel